The Benefits of DIY Skin Care
Embracing DIY skin care can bring a host of benefits.
- Customization: Tailor products to your specific skin needs and preferences. That means you can adjust ingredients to suit your skin type, whether it’s oily, dry, or sensitive.
- Natural Ingredients: Avoid harsh chemicals. With DIY beauty, you know exactly what you’re putting on your skin. Opt for organic, natural ingredients that are kinder to your skin.
- Cost-Effectiveness: Save money over buying expensive commercial products. Many ingredients used in DIY skin care like honey, coconut oil, and oatmeal are already available in your kitchen.
- Eco-Friendly: Reduce your environmental footprint. By making your own skin care products, you can decrease waste from packaging and cut down on the carbon emissions associated with manufacturing and transporting goods.
- Fun Activity: Enjoy the process of creating your own skin care products. It can be a rewarding and relaxing hobby that gives you a sense of accomplishment.
Incorporate these perks of DIY skin care into your routine for a more personalized and satisfying beauty experience.
Essential Ingredients for Homemade Skin Care Products
Creating your own skin care products at home starts with gathering the right ingredients. These essentials form the base of most DIY skin care formulas, offering a range of benefits to your skin.
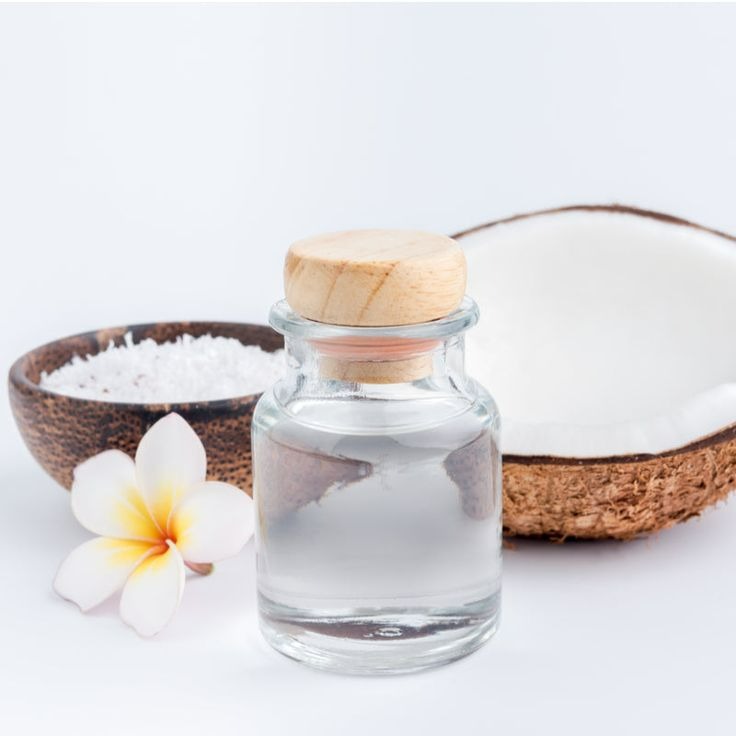
- Coconut Oil: A versatile oil that hydrates and protects. It can serve as a base for balms and creams.
- Shea Butter: Ideal for moisturizing, it gives a creamy texture to homemade products. It soothes dry skin effectively.
- Beeswax: Thickens balms and salves, and provides a protective barrier on the skin without clogging pores.
- Essential Oils: Used for scent and added benefits. Tea tree for acne-prone skin, lavender for soothing, and rose for hydration.
- Honey: A natural humectant, honey attracts moisture to the skin. It also has antibacterial properties, making it great for face masks and cleansers.
- Aloe Vera Gel: Soothes irritated skin and provides a cooling effect. It’s perfect for after-sun care products.
- Witch Hazel: Acts as a natural astringent for toners and cleansers. It can help to refine pores and reduce inflammation.
Incorporate these ingredients into your DIY skin care recipes and enjoy the natural, effective benefits on your skin. Remember, always patch test your homemade products to ensure compatibility with your skin.
Crafting Your Own Facial Cleansers
Cleansing is a crucial step in any skin care routine. Making your own facial cleansers lets you control what touches your skin. Here are some simple recipes and key ingredients you can use:
Gentle Honey and Yogurt Cleanser
This cleanser suits all skin types and is easy to make.
- Mix 2 tablespoons of honey with 1 tablespoon of plain yogurt.
- Apply to your face, massage gently, and rinse off with warm water.
Soothing Oatmeal Cleanser for Sensitive Skin
Oatmeal calms irritation and cleanses without stripping the skin.
- Grind 1/4 cup of oatmeal until fine.
- Add water to create a paste and apply in a gentle, circular motion.
- Rinse with warm water and pat your skin dry.
Oil-based Cleanser for Dry Skin
Oil cleansers maintain moisture while clearing away dirt.
- Mix equal parts coconut oil and olive oil.
- Apply to dry skin, massage, and remove with a warm, damp cloth.
Refreshing Green Tea Cleanser for Combination Skin
Green tea balances and detoxifies the skin.
- Brew a strong cup of green tea and let it cool.
- Mix with a teaspoon of honey and a splash of aloe vera gel.
- Apply with a cotton pad, then rinse.
Making DIY facial cleansers can be fun and rewarding. Try these recipes, or create your own based on your skin’s needs. Remember to always patch test new creations to rule out any sensitivities.
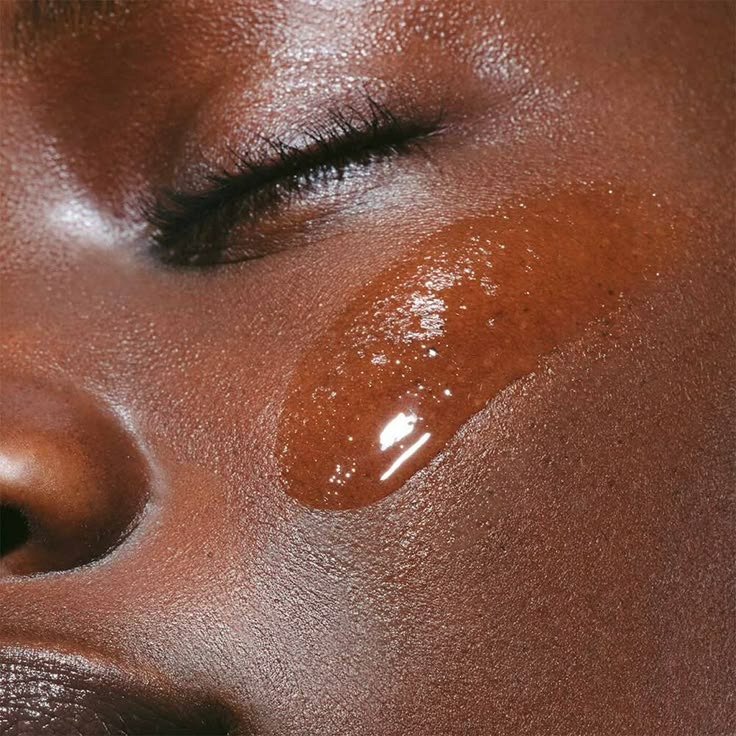
Natural Exfoliants for Smooth Skin
Exfoliation is key to revealing radiant skin. Remove dead skin cells and improve texture with homemade scrubs. Below are some natural exfoliants you can use at home:
- Sugar: It’s a gentle exfoliator, perfect for the body and face. Simply mix with a bit of coconut oil for a quick scrub.
- Salt: Choose fine sea salt for a more vigorous scrub. It’s great for rough areas like elbows and feet.
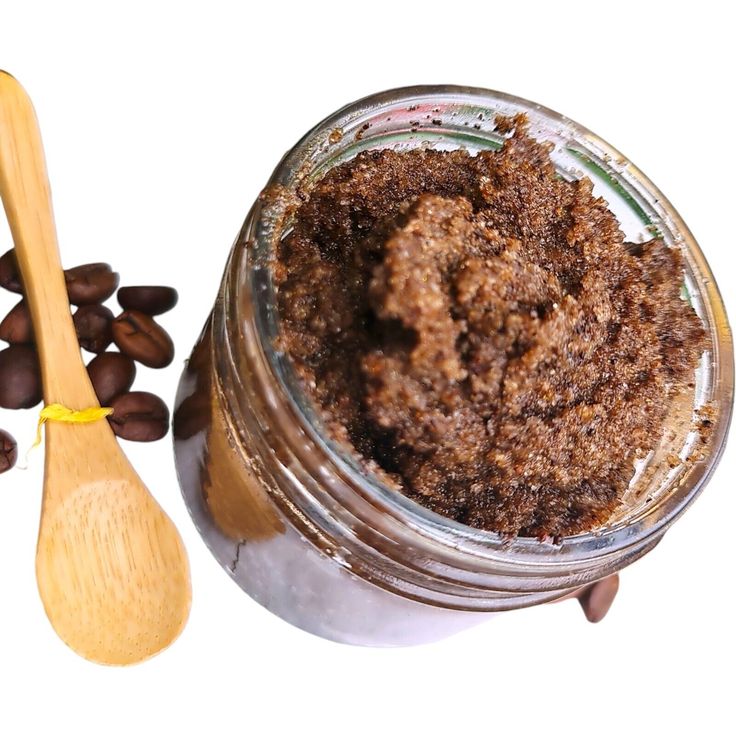
- Coffee Grounds: These can stimulate the skin and are ideal for a morning scrub. Combining coffee grounds with honey can create a rejuvenating scrub.
- Baking Soda: Mix this with water to form a paste for a mild facial exfoliant. It’s suitable even for more sensitive skin types.
- Oatmeal: Not only for cleansers, but oatmeal also makes a soothing exfoliant. Grind it finely, and mix with honey for a scrub that calms as it exfoliates.
- Rice Bran: Popular in Asian beauty routines, rice bran brightens and smooths the skin. Use as a gentle scrub on its own or with a splash of milk.
Combine these natural exfoliants with your favorite ingredients like olive oil or essential oils to enhance the benefits. Remember to exfoliate gently and not too often. Once or twice a week is enough for most skin types. After exfoliation, always moisturize to keep your skin hydrated and soft. Patch test homemade exfoliants to ensure they don’t irritate your skin.
Homemade Masks for Different Skin Types
Masks are a spa-like step in our skin care routines. They can hydrate, detoxify, and refresh your complexion. Here are some homemade mask recipes for different skin types:
For Oily Skin: Clay and Charcoal Mask
Combine bentonite clay and activated charcoal to remove excess oils and impurities. Use one tablespoon of each and mix with water to form a paste. Apply for 10 minutes, then rinse.
For Dry Skin: Avocado and Honey Mask
Mash half an avocado and mix with two tablespoons of honey. These ingredients deeply moisturize and nourish dry skin. Leave the mask on for 15 minutes before washing off.
For Sensitive Skin: Cucumber and Aloe Vera Mask
Blend cucumber and aloe vera gel for a soothing, cooling effect. Great for calming irritated skin. Keep on for 10 minutes, then gently rinse away.
For Combination Skin: Yogurt and Turmeric Mask
Mix plain yogurt with a pinch of turmeric. This mask balances and has mild exfoliating effects. Apply for 10-15 minutes, then rinse with lukewarm water.
For Acne-Prone Skin: Tea Tree Oil and Honey Mask
Use honey’s antibacterial qualities and tea tree oil’s acne-fighting properties. Add a few drops of tea tree oil to two tablespoons of honey. Spread over your face for 15 minutes, then rinse.
For Mature Skin: Banana and Rose Water Mask
Mash a ripe banana and add rose water for its hydrating properties. Apply this anti-aging mask for 20 minutes to help reduce the appearance of wrinkles.
Remember to always patch test your DIY masks to avoid any skin reactions. Use these homemade masks once or twice a week and follow up with a moisturizer to lock in the benefits.
Nourishing Moisturizers to Make at Home
Creating your own moisturizers gives you full control of hydration for your skin. Here’s how to do it:
- Shea Butter Moisturizer: Start with shea butter for its creamy texture. Melt a quarter cup and blend with coconut oil. This mix deeply moisturizes and is great for very dry skin.
- Aloe Vera Hydration Gel: Mix pure aloe vera gel with a few drops of vitamin E oil. This gel soothes and hydrates without feeling heavy, perfect for oily or combination skin types.
- Olive Oil Night Cream: Olive oil is full of antioxidants. Combine with beeswax and a few drops of lavender essential oil for a rich night cream that works as you sleep.
- Cocoa Butter Body Lotion: Melt half a cup of cocoa butter with a quarter cup of almond oil. This lotion is decadent and can help improve skin elasticity, good for all over the body.
- Avocado Anti-Aging Moisturizer: Avocado oil is known for its anti-aging properties. Whip together with aloe vera gel for a rejuvenating face moisturizer.
Remember to store your homemade moisturizers in a cool, dry place. Small mason jars or clean cosmetic containers work well. Patch test each product on a small skin area before regular use. Enjoy the benefits of a tailored skincare product that nourishes and protects your skin.
Balms and Serums for Targeted Treatment
The world of DIY skin care extends to special treatments – balms and serums. These products offer targeted action. They pinpoint specific skin concerns such as dryness, wrinkles, or dark spots.
DIY Balms for Intense Nourishment
Homemade balms can provide deeply hydrating solutions, especially for dry and chapped areas. Use simple ingredients like beeswax and coconut oil as a base. Add essential oils like lavender for added benefits. Here’s an easy recipe to start:
- Melt a tablespoon of beeswax over low heat.
- Stir in three tablespoons of coconut oil until well blended.
- Add a few drops of an essential oil, like lavender or peppermint.
- Pour into a small jar and let it solidify.
This balm is perfect for lips, cuticles, and even elbows. Apply as needed to relieve dry skin.
Serums for Personalized Skin Solutions
Crafting serums allows for custom skin care treatments. Pick ingredients based on your skin type. For an anti-aging serum, vitamin E, and rosehip oil are ideal. They help with fine lines and improve skin texture. A brightening serum might include vitamin C and hyaluronic acid. These ingredients lighten dark spots and hydrate deeply.
- Start with a carrier oil like jojoba or almond oil.
- Mix in a few drops of your chosen active ingredient.
- Store in a dark dropper bottle to preserve the oils.
Use these serums at night, after cleansing and before moisturizing. A few drops go a long way. DIY serums can boost your beauty routine with little effort.
In summary, adding balms and serums to your arsenal of homemade skincare can elevate your regimen. With consistent use, they address specific concerns and achieve improved skin health. Remember to patch test, and have fun with the process!
Tips for Storing and Using DIY Skin Care Products
Making your own DIY skin care products is fun and empowering. But, it’s important to store and use them properly to make sure they stay effective and safe. Here are some simple tips to keep in mind:
- Use Clean Containers: Always store your products in clean, sterile containers. This helps prevent bacteria growth.
- Keep Water Out: If your product is anhydrous (doesn’t contain water), try to keep it dry. Water can introduce bacteria.
- Label Clearly: Write down what the product is and the date you made it. This helps you keep track of freshness.
- Patch Test: Before using a new product widely, do a small patch test. Apply a little bit of the product to your inner arm first to ensure there’s no reaction.
- Watch for Changes: If a product changes in smell, color, or texture, it may be time to throw it out. Changes can signal spoilage.
- Cool Storage: Some products, like those with aloe vera, might last longer in the fridge. Cold can slow down the growth of bacteria.
- Sunlight Avoidance: Store products away from direct sunlight. Sun can degrade some ingredients, reducing effectiveness.
- Use Preservatives: If you’re making products with water, consider natural preservatives. Vitamin E and grapefruit seed extract are options.
- Small Batches: Make small quantities of products to use them up before they expire.
- Hygiene First: Always have clean hands before touching your products. This keeps them pure.
Remember these tips while enjoying your DIY skin care journey. They’ll help prolong the life of your creations and ensure your skin reaps the full benefits.